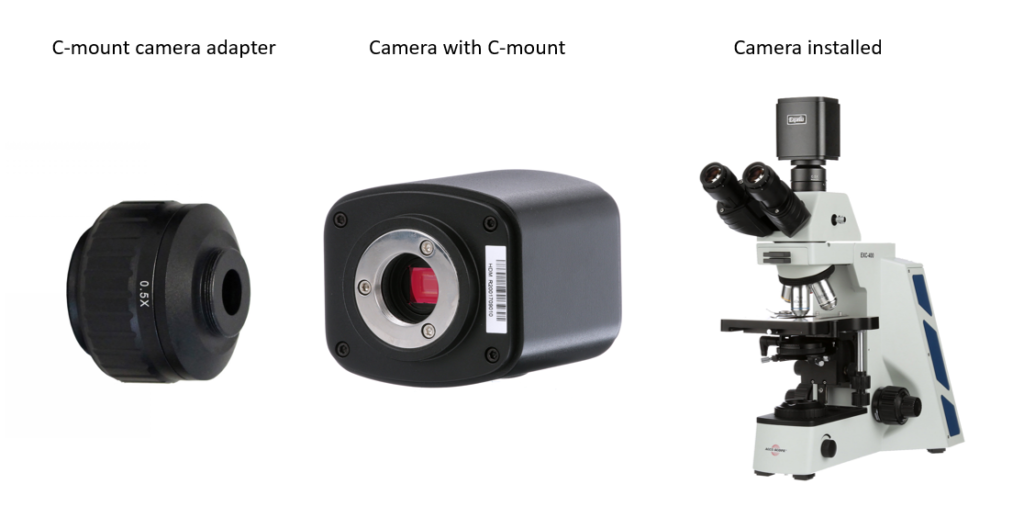
This may seem too obvious, but a major consideration when adding a camera to your microscope is how to make that connection between the camera and its lens — your microscope. If your microscope has a camera port or a trinocular viewing head, then it is easy to find an adapter that will couple a camera to the microscope. The most common adapters (a.k.a. couplers) for microscopy cameras is the c-mount adapter. It features an industry-standard 1” diameter thread with 32 threads per inch. The flange of the c-mount is 17.526mm from the camera sensor plane. The c-mount can accommodate cameras with sensors up to 18mm diagonal, beyond which cameras will use other types of mounts such as T or F.
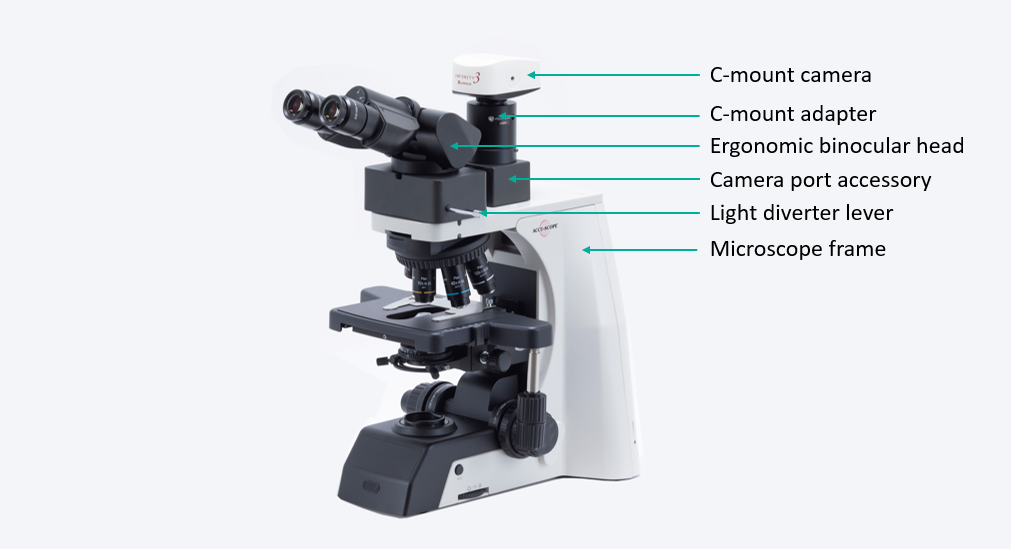
If your microscope does not have a camera port or trinocular head, you may be able to add a camera port as an accessory on some styles of microscopes. For some upright (compound) microscopes, ACCU-SCOPE offers an intermediate accessory that is installed between the microscope frame and the viewing head. The camera port on the accessory accepts standard c-mount adapters – you can contact ACCU-SCOPE for our recommendation of the best adapters to use.
One important note about camera adapters. They are available in a variety of magnifications, which are intended to match the image size coming from the microscope to the size of the camera sensor. Too low a magnification and you will see shading in the corners called vignetting. Too high a magnification and you only see a small portion of the field of view see through the eyepieces. To determine an appropriate adapter magnification for your camera, match the adapter magnification with the diagonal measurement (in inches) of the camera sensor. For example, a 2/3” camera sensor (2 ÷ 3 = 0.667) would use a 0.667X camera adapter. This is just an estimate, so consult with your microscope sales representative for options. Sometimes a lower magnification adapter will give excellent results while still avoiding vignetting. For more information on selecting a camera coupler, you can refer to this application note from our friends at Teledyne Lumenera.
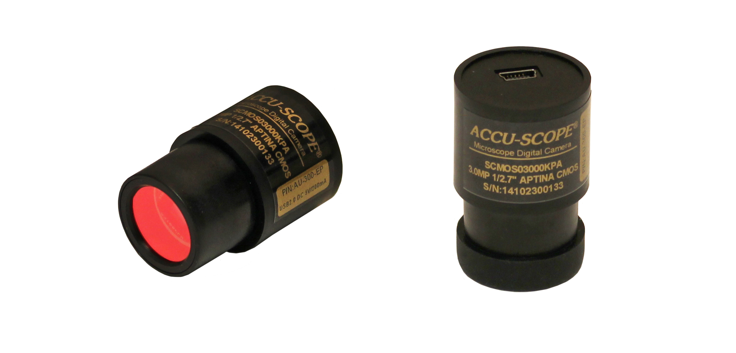
In the absence of any specific camera port, you can use the eyetube as the camera port. The ACCU-SCOPE ACCU-CAM eyepiece camera is designed to fit into the eyetube of your microscope without the need of an adapter – just remove the eyepiece first. The ACCU-CAM has a USB connection to a Windows PC for controlling the camera and snapping images. Eyepiece cameras can turn any microscope into a digital microscope, even monocular microscopes!
In the next installment of this series, we’ll explore the relationship of microscope resolution, camera resolution and pixel size and how these may impact your quest for a microscopy camera.